Part 1: Get Your First Trade under 5 min
Follow the exact steps to install, configure, and place your first order.
Part 2: Mental Model & Architecture
Understand Decibel’s three-tier account model, execution queue, and funding.
Part 3: Make It Yours
Customize markets, order logic, and Trading Accounts for your own strategy.
Part 1: Get Your First Trade under 5 min
Follow these steps exactly to get your first trade running.1. Prerequisites
- Node.js 18+
- Petra Wallet browser extension (recommended, optional thanks to Aptos Connect)
- Git
- Aptos CLI (recommended)
2. Get Your Credentials
You need two things: an API Wallet (for signing transactions) and an API Key (for authenticated API requests).Create API Wallet
- Go to app.decibel.trade/api
- Connect your Petra Wallet or “Continue with Google”
- Click “Create API Wallet”
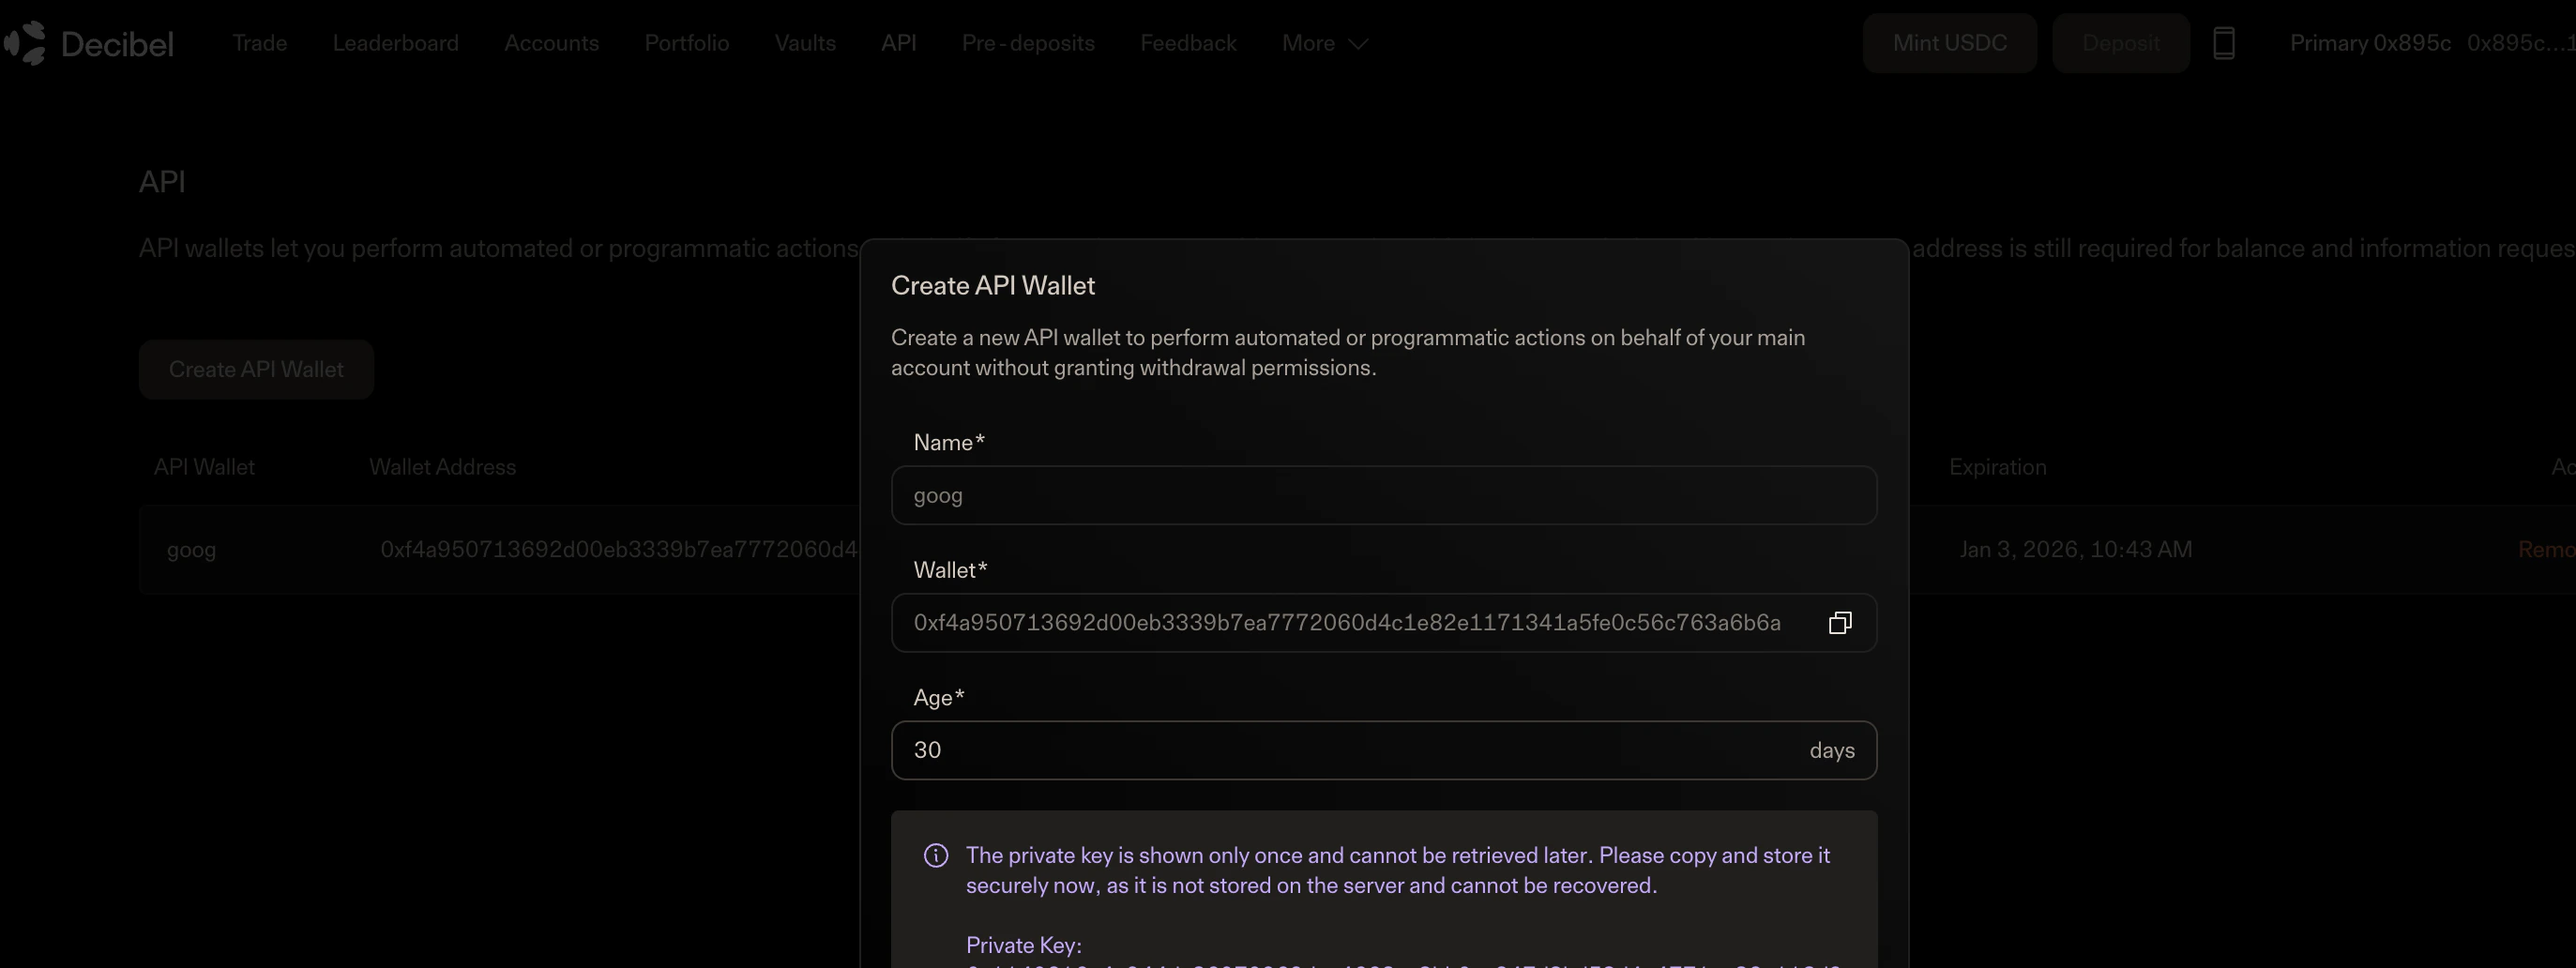
- Copy the Private Key immediately (you only see it once)
- Also save the Wallet Address shown on the same screen
Create API Key (Bearer Token)
The API Key is used for authenticated requests to the Decibel REST API. You’ll get this from Geomi (Aptos Build).-
Sign up or log in at geomi.dev
- Click “Continue with Google” or enter your email
-
Create or select a project
- If you’re new, you’ll see “No resources yet”, that’s fine!
- Your project dashboard will show available resources
-
Add an API Key resource
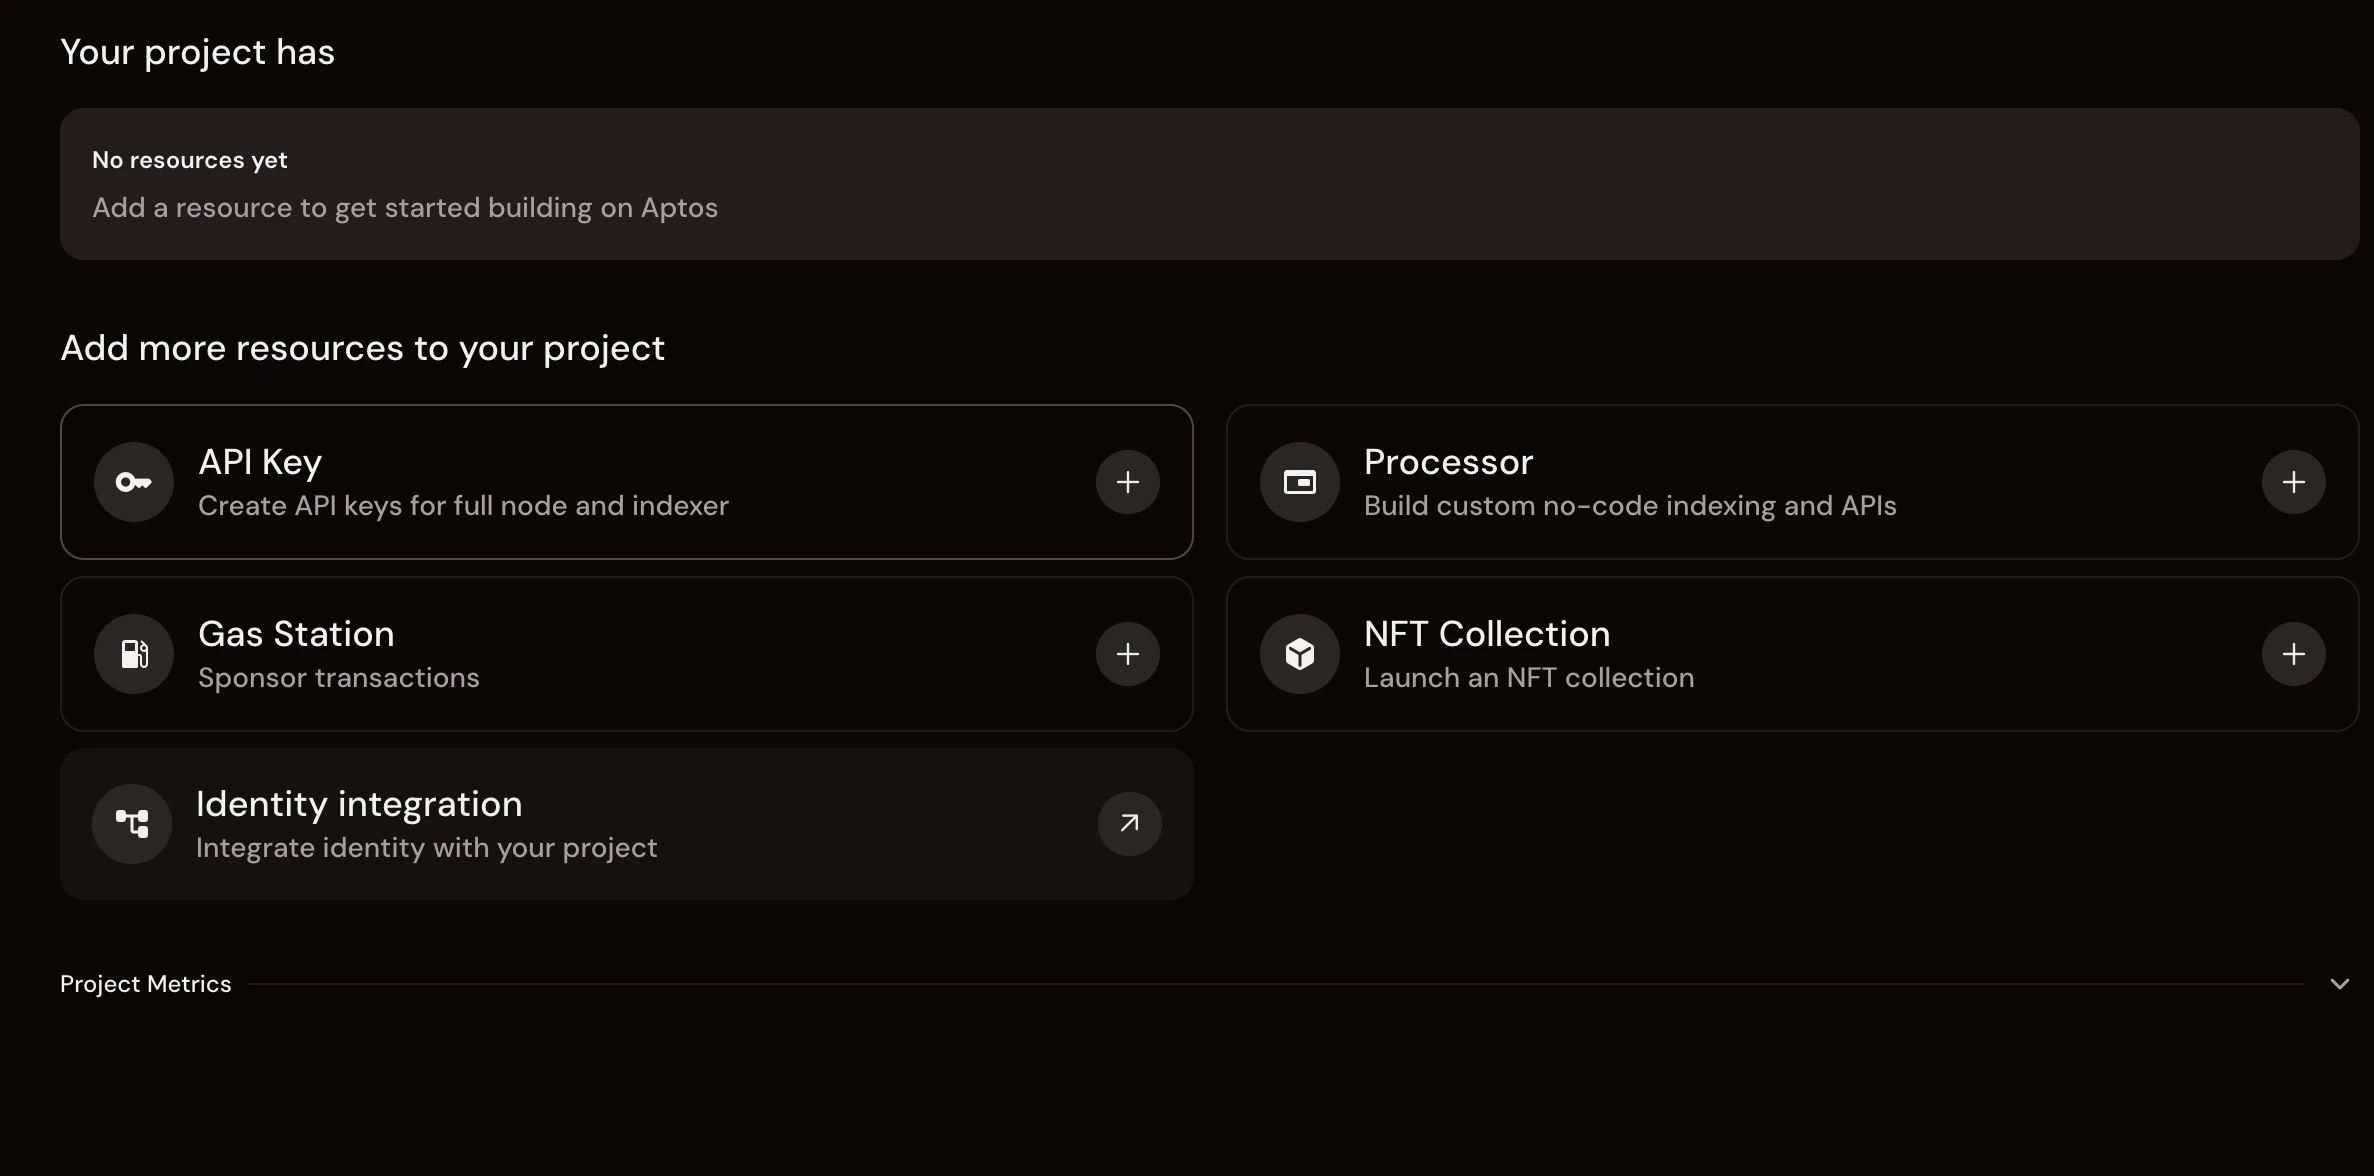
- Click the “API Key” card (find it under “Add more resources to your project”)
-
Fill out the API Key form:

- API Key Name: Choose a name (e.g.,
decibelormy-trading-bot) - Network: Select “Decibel Devnet” from the dropdown (important!)
- Description: Optional, add a note about what this key is for (150 chars max)
- Client usage: Leave this OFF (unless you’re building a web/mobile app)
- Click “Create New API Key”
- API Key Name: Choose a name (e.g.,
-
Copy your Bearer Token
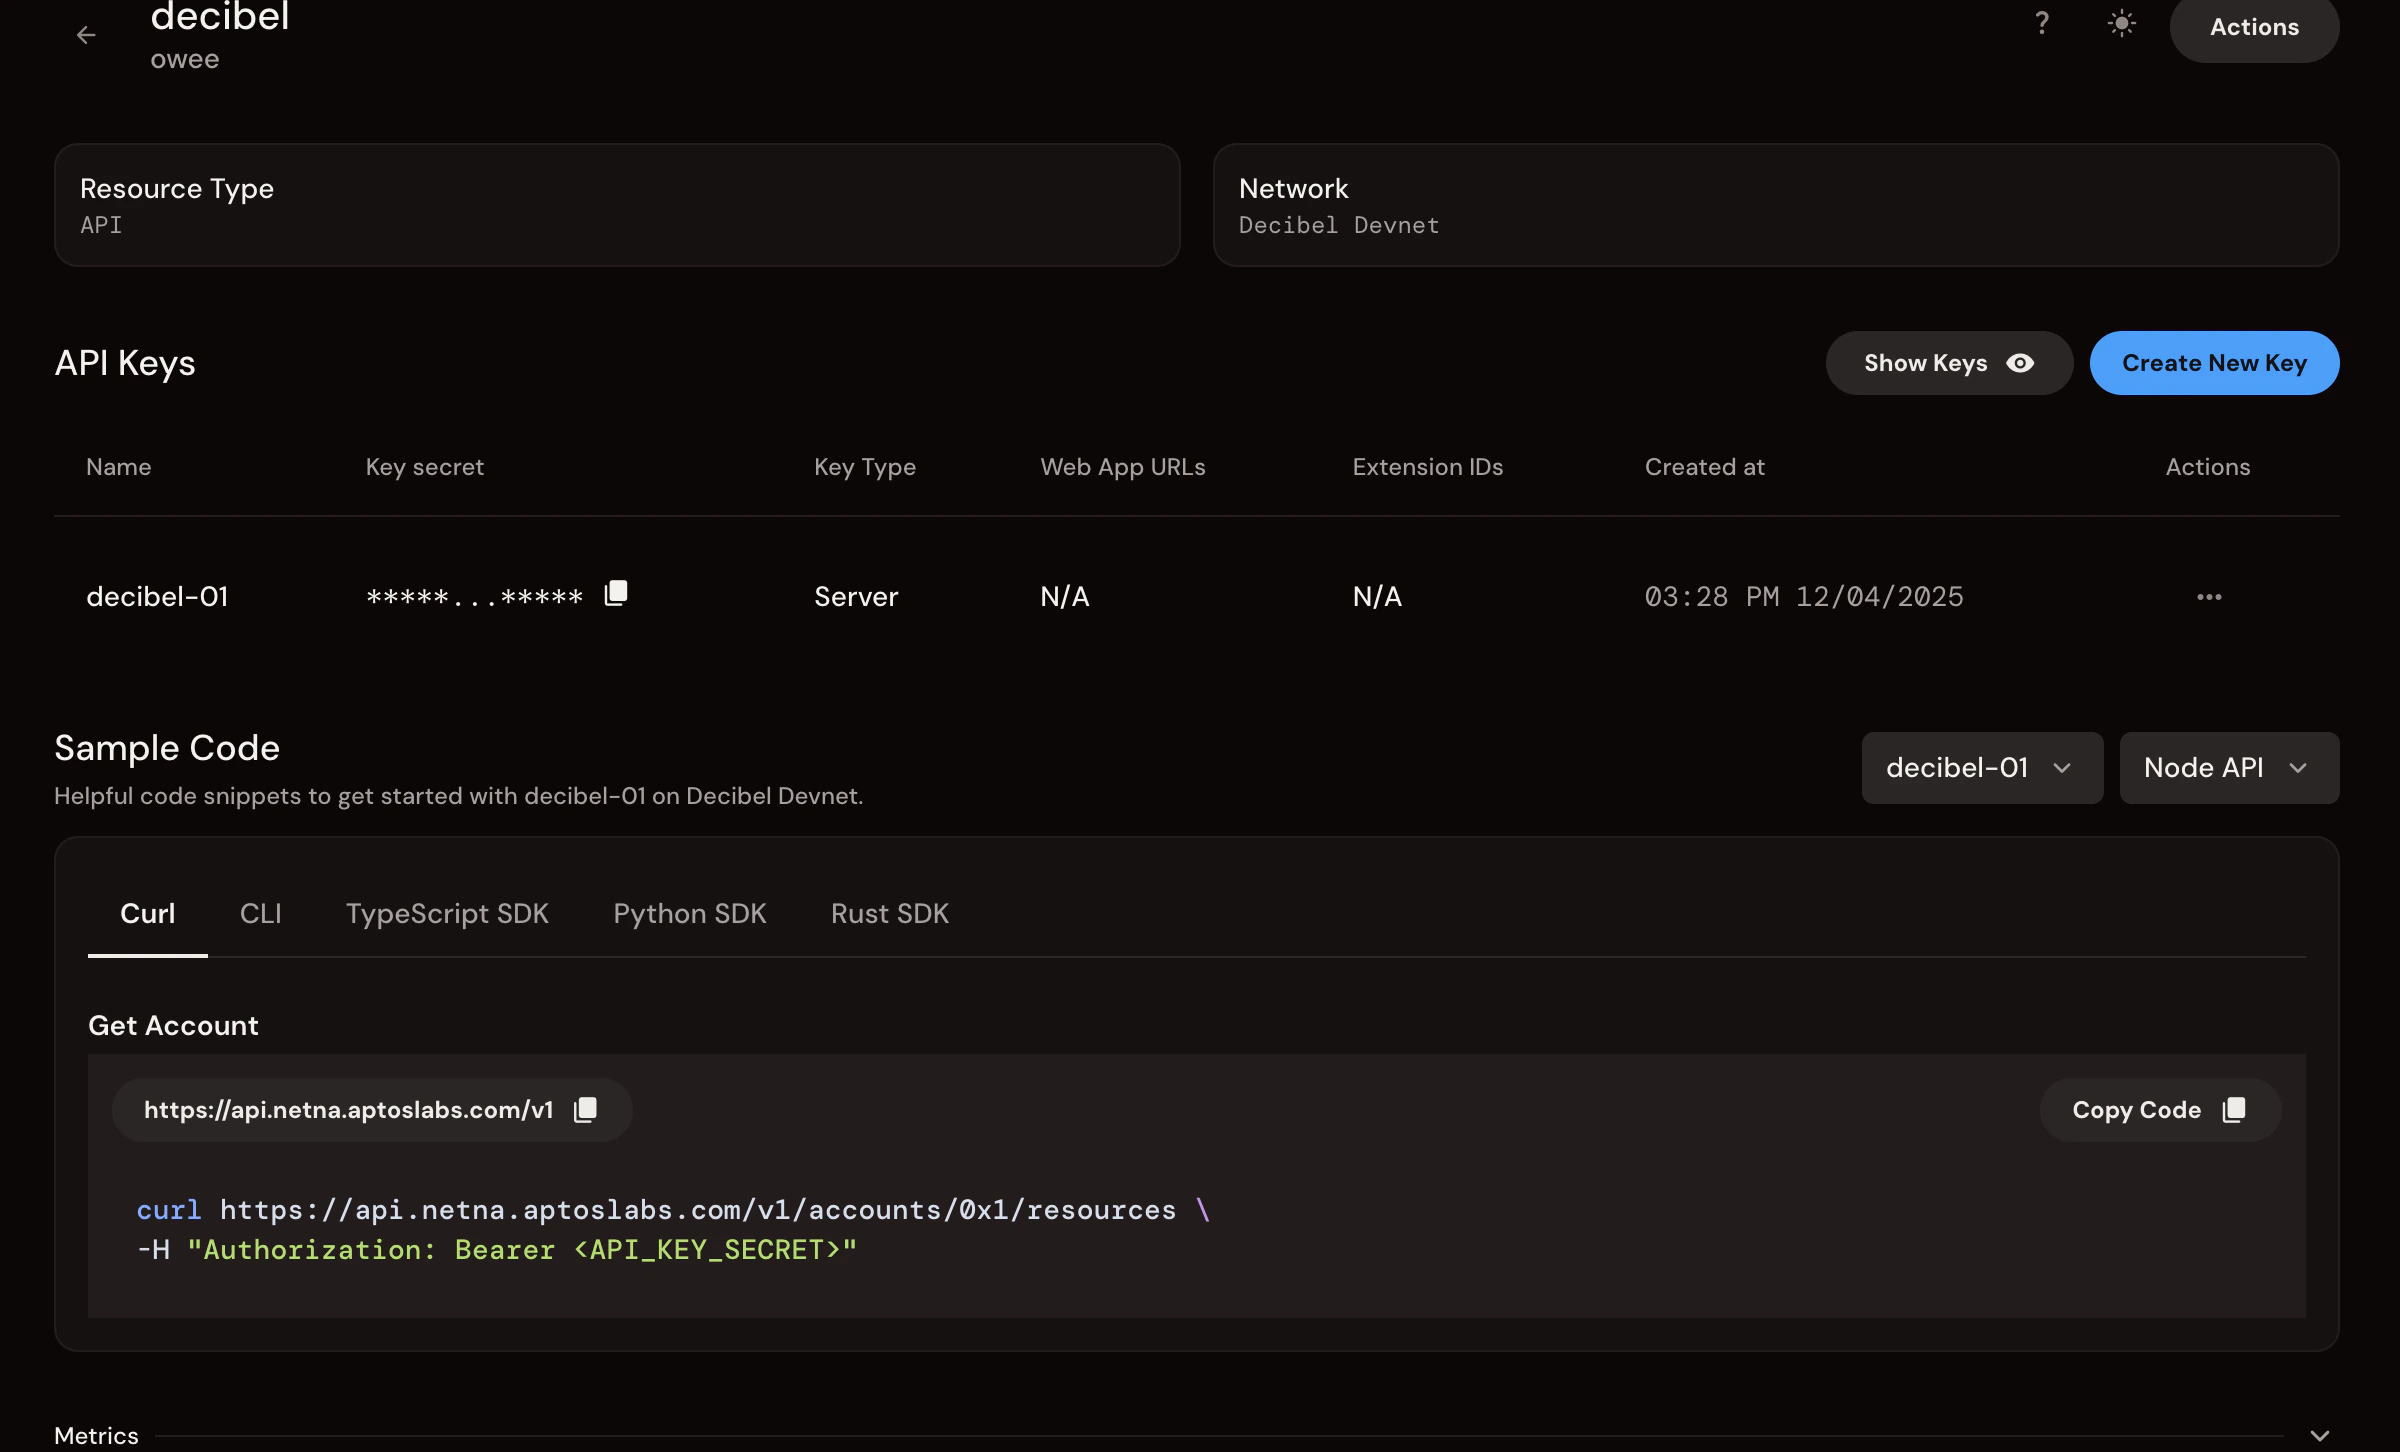
- After creation, you’ll see your API key in the “API Keys” table
- Find the “Key secret” column, this is your Bearer token
- Click the copy icon next to the masked key (shows as
*****...*****)
This “Key secret” is your
API_BEARER_TOKEN. It’s the full Bearer token, not just the key name.3. Configure the Project
.env and paste your credentials:
.env
-
API_WALLET_PRIVATE_KEY: From Decibel App (Create API Wallet). Both formats are accepted:- AIP-80 format:
ed25519-priv-0x...(as copied from the Decibel app) - Hex format:
0x...(64 hex characters)
ed25519-priv-prefix. - AIP-80 format:
-
API_WALLET_ADDRESS: From Decibel App (Create API Wallet) -
API_BEARER_TOKEN: From Geomi (Create API Key, “Key secret” column)
4. Run the “Quick Win”
This script handles everything: funding (via private faucet), account creation, minting USDC, depositing, and placing a trade.If you see ”🎉 Order Placement Complete!”, congratulations. The code works.
Part 2: Mental Model & Architecture 🏗️
Trading on Decibel has specific mechanics that differ from CEXs and many DEXs. Here are 5 key concepts for API traders.1. The Three-Tier Account Model
Decibel uses a three-tier account structure for programmatic trading:| Tier | Description |
|---|---|
| Primary Wallet | Your login account. Used to access Decibel App and create API Wallets. |
| API Wallet | A separate wallet for API trading. Holds APT for gas fees and signs all trading transactions. This is your API_WALLET_ADDRESS. |
| Trading Account | Created from your API Wallet. Holds USDC for trading collateral. Address is extracted from transaction events and written to .env as SUBACCOUNT_ADDRESS. |
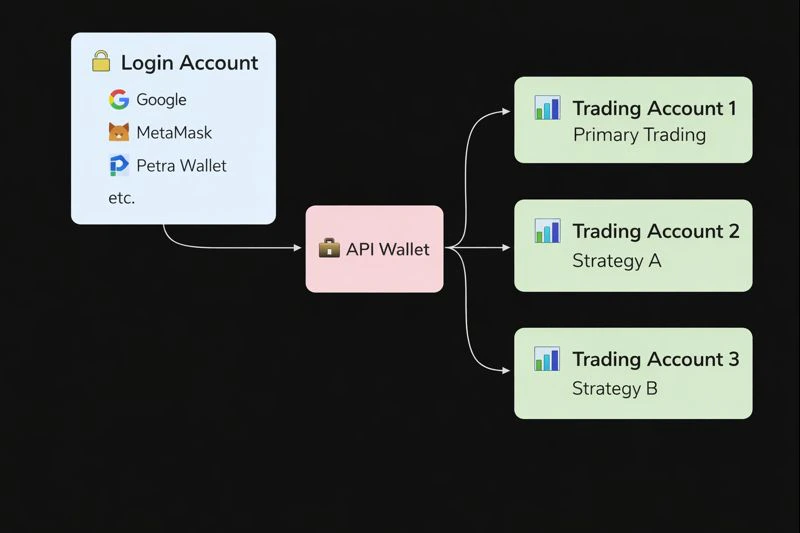
For API traders, you primarily interact with the API Wallet (not the Primary Wallet). Most users will have a single Trading Account, though you can create multiple for different strategies.
2. Async Execution (The Queue)
Decibel is an on-chain CLOB (Central Limit Order Book).| Platform | Behavior |
|---|---|
| CEX | response = placeOrder() → Returns “Filled” |
| Decibel | response = placeOrder() → Returns “Transaction Hash” (Ticket to the Queue) |
3. “Lazy” Continuous Funding
- Traditional: Pay funding every 8 hours
- Decibel: Funding ticks every second (continuous accrual)
4. Reduce-Only Logic
Decibel implements strict “Close First” logic. A Reduce-Only order will never flip your position (e.g., Long 1 → Short 1). It caps execution at your current size, preventing accidental exposure when closing positions aggressively. See Place Order for implementation details.5. Bulk Orders (Unique Optimization)
For Market Makers and HFTs: You can update multiple orders in a single transaction, saving gas and getting atomic updates for spread management. See Place Bulk Order for implementation details.Part 3: Make It Yours
Now that you have a working baseline, here’s how to adapt this code for your actual strategy.How to Trade a Different Market
Opensrc/5-place-order.ts. Find the “Configuration” section.
Change this:
Run
npm run setup to see a list of all available market names. Market names use the format SYMBOL/USD (not SYMBOL-PERP).How to Change Your Order Logic
Opensrc/5-place-order.ts. Find the “Order Parameters” section.
Change this:
Focus on Order Management
After runningquick-win, you have a funded Trading Account ready to use. You can now focus on:
src/5-place-order.ts: Customize your trading strategysrc/6-query-order.ts: Check order status
How to Use a Different Trading Account
If you want to use a specific Trading Account (e.g., for a different strategy):- Create a new one:
npm run create-subaccount - The script automatically updates your
.envfile with the newSUBACCOUNT_ADDRESS - Run
npm run deposit-usdcto fund it
- Calls
create_new_subaccount, which creates a non-primary Trading Account (random address) - Extracts the Trading Account address from the
SubaccountCreatedEventin the transaction events - Verifies the address via the API (with up to 5 retries for indexer lag)
- Writes the address to your
.envfile
- After running
create-subaccount, check the list of Trading Accounts it prints - Manually edit
.envand setSUBACCOUNT_ADDRESSto the address you want - Or modify
src/2-create-subaccount.tsto change the selection logic
Part 4: What’s Next? 🚀
Resources
Full Documentation
Complete Decibel documentation
Placing Your First Order
Alternative guide with Testnet examples
Discord Community
Get help from the community
Aptos Testnet Faucet
Fund your API Wallet with Testnet APT for gas